

after many years of holding flowers.
I decided to replace it.

Each yr. I planted some different in it.
When I finally replaced it, I discovered
it didn't have a bottom. 😆
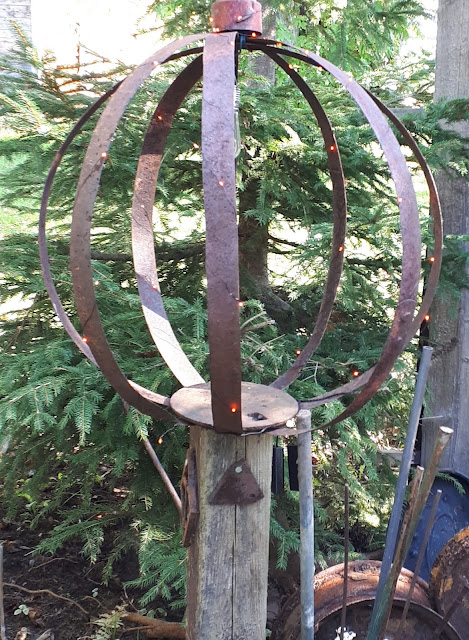
I made a Garden Orb
with the old rusty bands/staves
It was my first time making one.
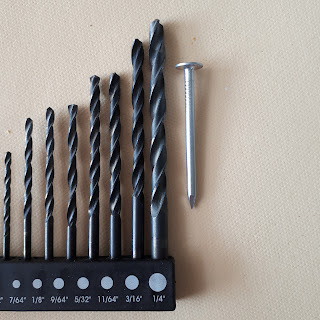
It was also my first time drilling in metal.
I used the largest drill bit I had. 1/4 inch.
I drilled a hole through each band separately
and aligned them together.
My sister Annie helped hold them in
place as I screwed a long screw into the holes
and into a post below. A 3 inch screw.
Then I place large head nails between
each band to keep them from moving.
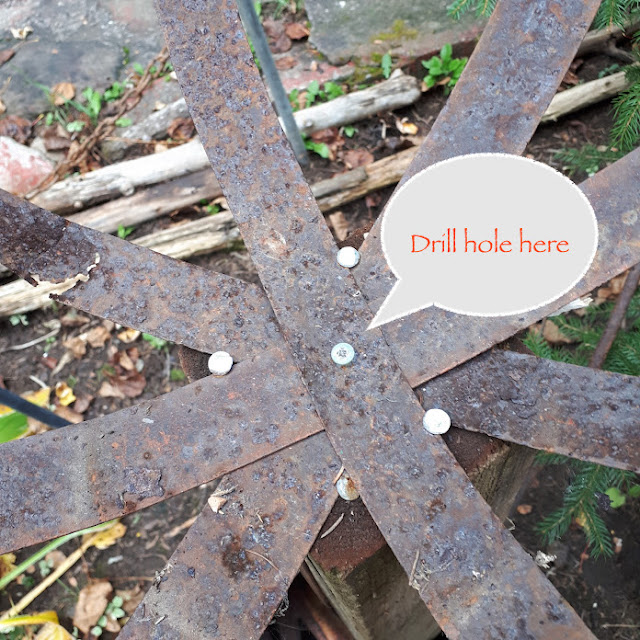
I used the 1/4" bit
and 2 inch nail.
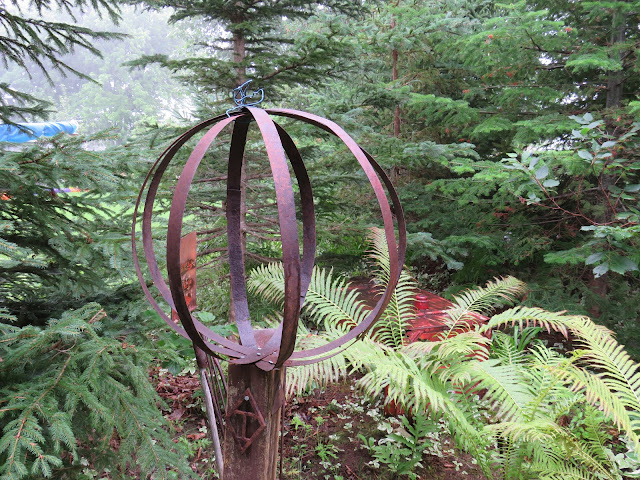
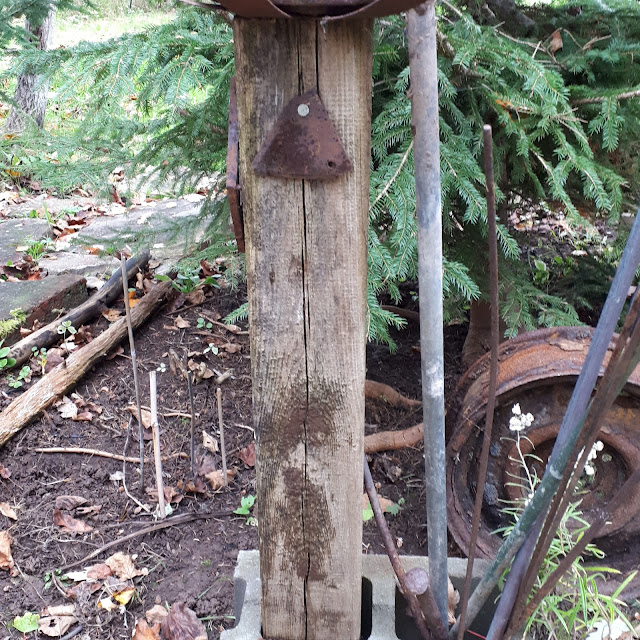
I screwed it on a 5x5 cedar post
that I had on hand, 3 ft. long.
(A 4x4 will do also.)
I had no idea how I was going to make it stand up.
My sister Annie came up with a brilliant idea.
Place it in a cement "builders block"
which I had on hand also.
It fit in one side and we placed a few small pieces
of wood to secure it straight. It will never fall.
I placed some metal pieces in the other
side temporarily until I come up with
a better idea maybe I will plant flowers in it.
.
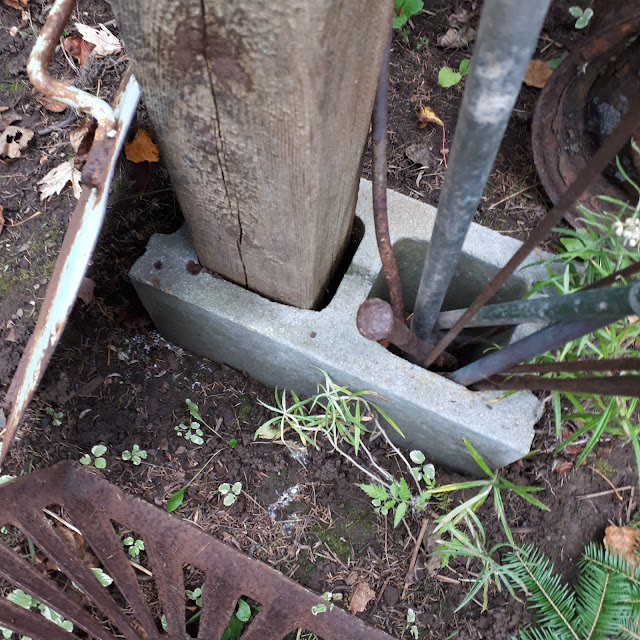
The builders block could also be hidden
by digging down and hiding it in the earth.
Or hide it with something rusty.

To hide the nails and screw,
I placed a rusty old stove cover on top

On the top of the orb,
I wired the staves together with rubber covered wire.
(It would have been better screwed together
also, I never got around to doing it.)
I will probably put a screw and
nut to secure it better.
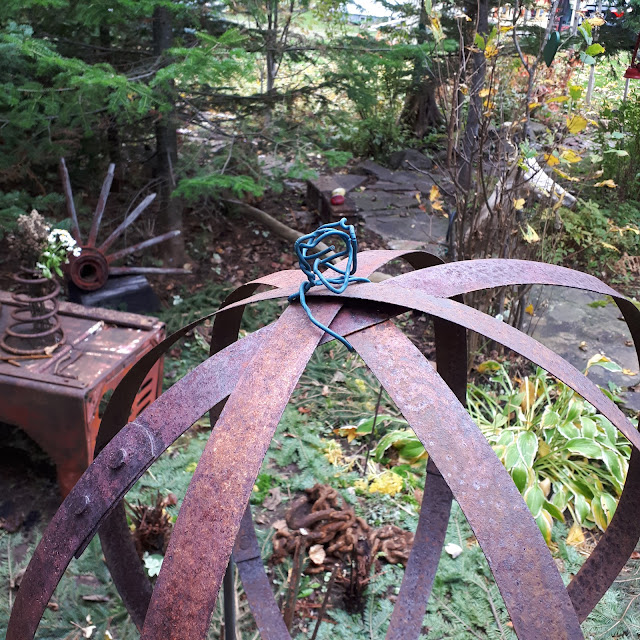
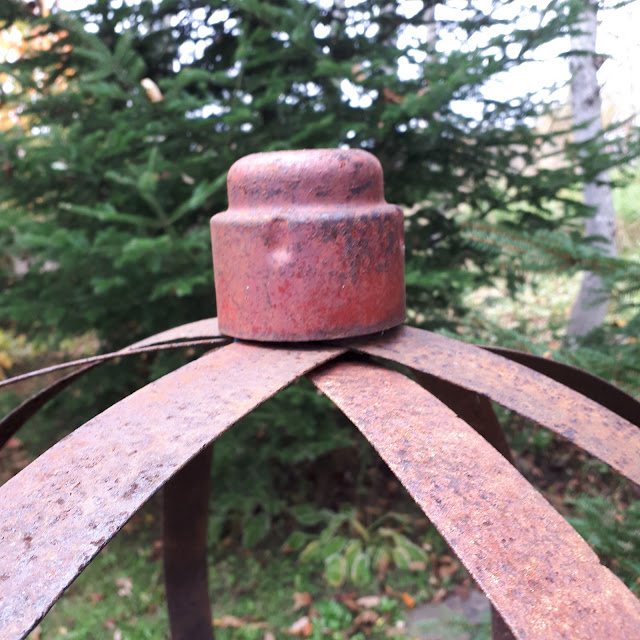
I placed this metal cup that I found.
(I have no clue what that was used for)
The wire seems to keep it secure.
I decorated with some
lights from the Dollarstore.
and decorated the post with small
ornaments of rust.
I'm pleased with the way it turned out.
It does add rustic charm and
focus to the garden.
I would like to find another band/stave to
place horizontal to the middle.
Also maybe something to fit into the orb.
After placing it into the garden,
this encouraged me to add more rusty
things that I had in the shed.
Things I found when digging
and cleaning up the property.
And it evolved into a
Thanks for your visit and I hope
this was helpful to anyone
wanting to make one.
💛💛💛
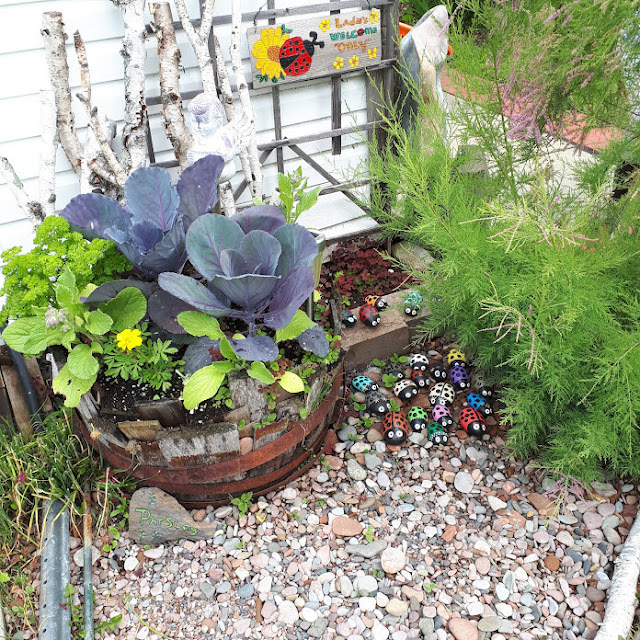
I missed those adorable ladybugs on my last visit...so cute. What a great project, and definitely a show stopper! Hugs, Sandi
ReplyDeleteThanks Sandi. My sister Annie painted those lady bugs.
DeleteAren't you amazing and clever! I don't know that I could ever do that -- and it looks specacular! You always have a beautiful garden and this makes it all the more so. Well done, Thelma! (And thanks for stopping by the other day, too!)
ReplyDeleteThanks Jeanie xo
DeleteMy son used to obsess over ladybugs when he has little and we had rocks painted just like the ones in your photo all over the house!
ReplyDeleteLove your beautiful garden.
Thanks Veronica. My sister Annie paints rocks. I have them all over also. Rock painting is a great therapy.
ReplyDeleteThelma, that looks great. I love old rusty things. Our barrel fell apart too and I hang the staves on the wall with a wreath or ?? inside of them. I love your idea so might have to try it..Happy Thursday..xxoJudy
ReplyDeleteThat's a great idea for a wreath. Take care.
DeleteThanks for stopping by my blog, Thelma. This is really neat and I'd better not let my wife see it or she will want me to make one.
ReplyDelete